
We know how tormenting can be to lose your iPhone data. All those pictures that you took with your buddies, all the memories, all the files that you should have kept as safe as possible, all that rare music…But don’t freak out because this can happen to anyone and that’s why a lot of software developers have figured out various solutions to this nightmare.
For instance, you can keep your most precious pics on iCloud because all you need to know will be how to download photos from iCloud and your pics will be more than safe there in case you lose your copy on the mobile device.
You’ll be more than happy to know that there are a lot of solutions these days that can help you get back your lost data even if this might seem a really challenging task at the beginning. If you use the best recovery tool, we guarantee that your files are back in your iPhone safe and sound as quickly and effectively as possible.
Here’s the latest tool that we tried out to recover lost data and it worked its magic more than expected.
UltData-iPhone Data Recovery review
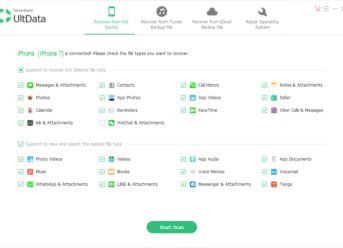
The program promises users to allow the recovery of lost data straight from the iOS device, iTunes and iCloud backup. The UltData-iPhone Data Recovery software claims that while using the program, you will be able to get back your lost files safely and selectively as well. What we can tell you is that the program does support more than 35 file types and it’s great to see that it’s compatible with the latest iOS 12 and iPhone XS/XS Max/XR. Here’s what we did to recover our iOS 12 lost data.
First of all, we installed the software on our computer and connected the mobile phone to it via a USB cable. After connecting the iPhone to the PC, UltData detected the device as being trusted. It’s important to know that if the device is not trusted, then you’ll have to unlock it and check the computer screen which should be displaying a message in which you’re asked to Trust the computer.
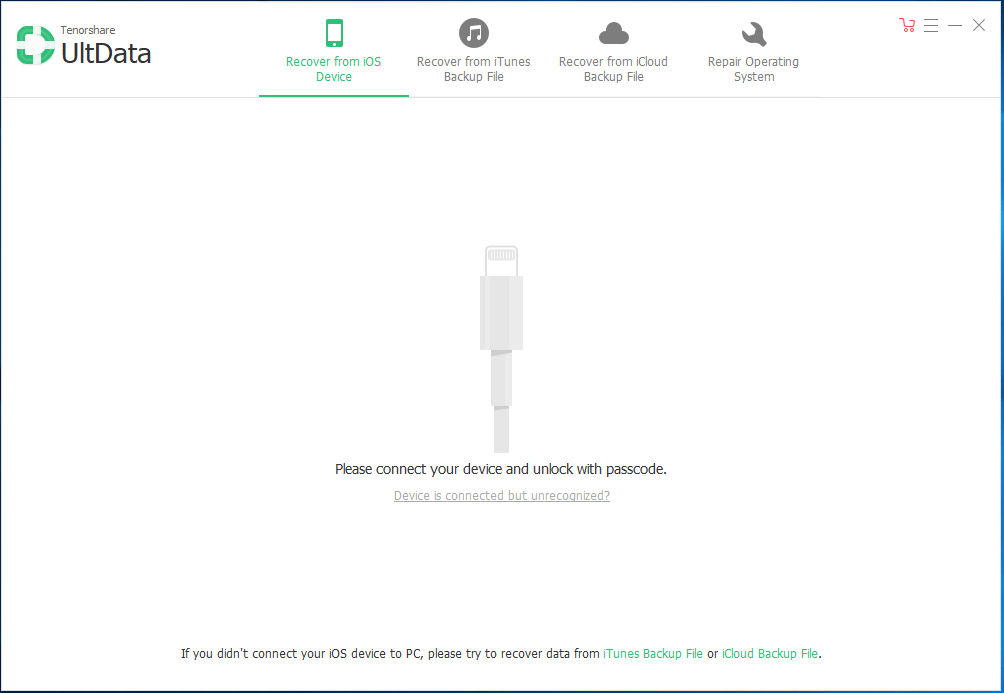
Anyway, the main screen of the software will pop up, and there are four options on the menu bar. We chose to recover data from the iOS Device, and we just had to select that box and click on Start Scan button. After getting back the lost data, we clicked on the Recover button, and this was it. We did not expect things to go this simple but they did, and all the lost files were back.
You should definitely give this software a try, especially since you can benefit from the free trial.


Henry Lares is still early into his career as tech reporter but has already had his work published in many major publications including Tech Crunch and the Huffington Post. In regards to academics, Henry earned an engineering degree from Apex Technical School. Henry has a passion for emerging technology and covers upcoming products and breakthroughs in science and tech.

