Categories
Tech

Easy fixes WMI Provider Host High CPU usage on Windows 10

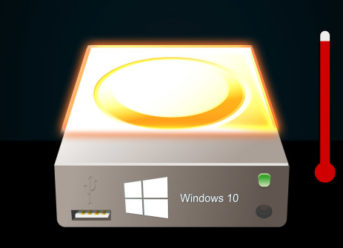
What is WMI Provider Host?

It is a Windows Host Management Process that is used by developers in order to monitor hardware. It has been observed that upgrading from Windows 7 to Windows 10 may lead to severe spike in CPU usage by this process.

How to fix the issues?

Fix 1

Restart the Windows Management Instrumentation Service

  1. Open a Run windows via the Start menu or Windows key+R
  2. In the Services window locate the Windows Management Instrumentation Service.
  3. Select the service and right-click on it. Select Restart from the context menu.

Fix 2

Use Command Prompt to restart other potentially malfunctioning services

  1. Open Command Prompt by either entering cmd.exe into a Run window or search for it in the Start menu. Right click on it and select Run as administrator.
  2. After it opens, type the following lines and press Enter after each one:
  • net stop iphlpsvc
  • net stop wscsvc
  • net stop winmgmt
  • net start winmgmt
  • net start wscsvc
  • net start iphlpsvc

Reboot your PC and check if CPU usage is now normal

Fix 3

Track don malfunctioning programs and remove them

Some programs may become corrupt in time without any visible signs. In order to identify if any programs may be blamed for CPU over usage we will use a program named Event Viewer

  1. Open Event Viewer. From Windows 8 upwards, press the Windows key and X to open the WinX menu and click on Event Viewer. For Windows 7 ,search event Viewer in the start menu and click it from the list
  2. In the Event Viewer windows click on View and on Show Analytic and Debug Logs
  3. GO to the left panel of the same window and navigate to Applications and Logs/Microsoft/WMI-Activity/ Operation. Look for any errors
  4. In the general tabs where details are depicted look for the ClientProcessID and write down the numbers.
  5. Open Task Manager via the Start Menu or Ctrl-Shift-Escape. Click on the services tab and search for services that have the same Process Id as those you noted in the previous step.
  6. Disable the guilty process and uninstall the associated program via Programs and feature from either the Control Panel or the Start menu. CPU usage should return to normal.
Categories
Tech

GBWhatsApp 6.40.1 Update with Improved Performances is Now Available

WhatsApp is one of the world’s most popular apps with a massive user base of 1.5 billion monthly active users. The secret behind WhatsApp’s popularity is the fact that it offers a plethora of features that are specially designed to help people communicate. However, WhatsApp can get even better by adding the GBWhatsApp mod. In fact, a brand-new version of the mod has just been released and today we will present everything there is to know about it.

GBWhatsApp 6.40.1 APK Update

Even though GBWhatsApp is free to download, the mod has a large team of developers who are always working on new software tweaks, features and bug fixes that improve its performance. Therefore, a new APK update which changes GBWhatsApp’s version number to “6.40.1” has just been made available for download.

Improved Performance

As previously mentioned, GBWhatsApp’s developers have made it their top priority to improve the performance that the mod offers. With that being said, the new “6.40.1” update is packed with a bunch of software tweaks that optimize GBWhatsApp and make it perform faster than usual.

Highlight Features

Since we are talking about GBWhatsApp, let’s go over some of the highlight features that it has to offer in order to give readers an idea of why they should give it a try.

  • Improved video calling feature;
  • GBWhatsApp allows users to hide their last “seen” messages;
  • GBWhatsApp can share any video that measures up to 50MB;
  • Delete or recall all sent messages on WhatsApp;
  • Group names can now reach up to 35 characters;
  • Copy other user’s statuses on your clipboard;
  • New emojis;
  • GBWhatsApp doesn’t ban users;
  • GBWhatsApp can send up to 90 images at the same time;
  • Users can create their own WhatsApp theme;
  • GBWhatsApp comes with 100+ language support;
  • Users can change notification icons.
Categories
News Tech

How to Solve Windows 10 100% Disk Usage Issues

What causes the problems?

The System and compressed memory process is the usual culprit when high CPU and disk usage are observed. While normally it uses reduced resources, certain problems lead to the process overloading the disk to 100% slowing everything to a crawl. There are to main reasons that may cause the process to go haywire: poorly configured virtual memory settings or core Windows files are corrupted. In order to fix the problem, follow the advice below:

  1. Restore paging file size to default

On Windows 10, the paging file size for all drives is automatically managed by the OS in order to assure the best performance possible. While tech-savvy users may opt to enter custom values,  restricting the size below a recommended limit may cause the System and compressed memory to malfunction, which will lead to the notorious 100% disk usage. You changed the paging file sizes, reverting to default rules is the optimum solution.

  1. Open the Start Menu. Search for performance and select ‘’Adjust the appearance and performance of Windows’’ from the list
  2. Select the Performance Options Window then click on the Advanced tab
  3. Click on the Change… button and tick the ‘’Automatically manage page file for all drives option’’
  4. Click OK, and on Apply and OK in the performance menu
  5. Reboot the system and the issue should be soled
  6. Disable the system and compressed memory process
  7. Go to Start/Control Panel/ Administrative Tools/Task Scheduler
  8. Select the Task Schedule Library from the list
  9. Select Microsoft and after the lists expands select Windows
  10. Select MemoryDiagnostic and right click on RunFulllMemoryDiagnostic Entry
  11. Choose Disable, close the window and reboot your PC

If A and B did not work, have no fear. There are plenty of solutions left for you to try. One of the is guaranteed to fix your problem

  1. Disable the Superfetc h service

Designed to maintain and improve performance of the system over time, the Superfetch service may sometimes by the cause of your disk woes. There are multiple ways to disable the service, with themost popular listed below:

Method 1: Disable Superfetch from the Service manager

  1. Start a Run instance by searching for it in the Start menu or pressing the Windows key and R
  2. Type services.msc and press enter. A window named Services will open
  3. Search for Superfetch
  4. Click on Stop and set the Startup type do disabled
  5. Click on both Apply and OK
  6. Reboot your system

Disable Superfetch using the Registry Editor

  1. Open Run
  2. Type regedit and press enter
  3. Navigate to HKEY_LOCAL_MACHINE > SYSTEM > CurrentControlSet > Control > Session Manager > Memory Management
  4. Click on the PrefetchParamters under Memory Management
  5. Locate and double click on the value named Registry Editor. Change the value to 0
  6. Click on OK and reboot your system

D: Stop the Speech Runtime Executable process

  1. Launch Task Manager via the Start Menu or CTRL-Shift-Esc
  2. Go to the Processes tab and find the Speech Runtime Executable
  3. Select the process and end the task

Disk load should decrease considerably if this was the issue

  1. Check for faulty RAM

In some cases the issues may be caused by a faulty RAM stick. Buy or borrow a compatible RAM stick. Swap each stick of RAM, one at a time, and restart the system. If after you took out a particular stick, the system performs better, that stick may be damaged and the cause of the overload.

Other potential causes and solutions.

If you upgraded several times from one version of the OS to another (Windows 7/8/10) without a clean install, there may be permission conflicts depending on the status of the account before the update. A clean installation may fix your issues and give your system a fresh start.

Categories
News Tech

New PUBG Update Introduces Dynamic Weather and Changes How Hit Boxes Work

PUBG was the first ever Battle Royale game to become a major success, but it’s placed as the most popular shooter game in the world was soon taken by Fortnite. PUBG’s developers have been working hard to create new features, content and in-game mechanics to help the game compete against Fortnite which is currently considered as a cultural phenomenon.

Introducing Dynamic Weather

With that being said, the developers who are in charge of PUBG have recently released a new update for the PC version of the game and it introduces dynamic weather to the Erangel and Miramar maps alongside other cool features. We should also mention that the river banks of Erangel have now been modified to cover around the Sosnovka Military base.

Changing Hit Boxes

The biggest issue that PUBG has are hitboxes. Players keep complaining that they get killed by their enemies when the bullets shouldn’t even hit them, but it looks like the developers have been listening to the feedback. The reason we are saying this is because the new update changes how the hit boxes work and bullets have been altered to hit flailing arms first instead of registering the damage directly to the body.

“This penetration system works for the head, torso, and waist only. If a bullet penetrates the forearm, but no vulnerable body part is behind it, only the forearm damage will be applied,” said the developers in a recent blogpost.

Miramar Sunset

One of the coolest things to be added alongside the new update is targeted directly to Miaramar. PUBG fans should be happy to know that this map will now feature sunsets and that the dynamic weather will play an important role because the sunset will blind players who are looking at it.

Categories
Crypto News

Snap Inc. Claims that its Source Code was Hacked; Flies past Wall Street Estimates

If you didn’t know, Snap Inc. is the company responsible with running Snapchat. Apparently, earlier this year they were hacked and in this process some of its incredibly wanted source code was released to the public. Motherboard let us know that this source code was for Snapchat’s iOS.

How did it happen?

Before the hacking happened, Snap Inc. archived its source code on GitHub, a code repository site. After the event occurred, Snap asked GitHub for its code back and delivered a copyright act request as well.

A Snap representative spoke about what happened in May. Apparently, an update to the iOS caused the leakage of some of the source code (a small amount, they say) and they had to act swiftly to identify and rectify the mistake. They soon found out that their code is posted online, although it was soon deleted. They feel that their app and the community weren’t affected at all by this event.

How about the finance?

At first Snap observed a loss in daily active users, a first for this company. However, its shared flew by Wall Street estimates, rising by 6%. Still, investors became cautious and Snap lost shares by 3.4%.

Regarding the per share basis, Snap reported a loss of $0.14 on revenue of $262min. Wall Street projected that these numbers would be $0.17 on revenue of $251min. The daily active users fall was also mispronounced by Wall Street, Snap reporting a fall from 191min to 188min.

This user decline raised concerns about Snap’s ability to compete in a market saturated with social media outlets. As to why this fall happened, there could be multiple reasons. One of them would be the redesign that happened earlier this year, which resulted in some people becoming less able to navigate the site.

Exit mobile version