Categories
Tech

Top Reasons to Buy an iPhone

Many people consider iPhones too expensive for what they have to offer, but we all know how the world works: people say a lot of things that are not necessarily true. About 1.5 billion of the world’s population represents active iPhone users, and that number will probably even go up in the near future.

Let’s say you think about buying an iPhone while you’re still not absolutely sure that it’s what you need and want. You can’t buy an iPhone or any other gadget just because your friend has one, as you’re an educated and rational person who seeks objective arguments above anything else. Or at least that’s how it should be. Either way, let’s see what the most important reasons you can have for buying an iPhone, whether it’s one of the old models or a high-end device (iPhone 15, iPhone 14, iPhone SE, etc.):

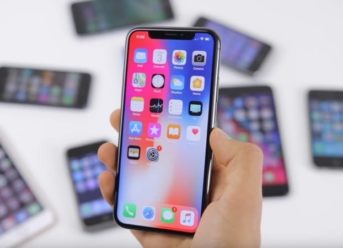
Both the software and hardware parts are built by the same company

One very important difference between iPhones and Android devices is that in the case of the first gadgets, the same company is responsible for creating both the software and the hardware part. Apple has created and maintains the iOS operating system, while the same Cupertino-based giant is also responsible for creating the iPhones themselves. Before asking, “so what?,” you must be aware that any device will work much better if the operating system cooperates efficiently with its hardware area. That’s certainly the case for iPhones, which is why so many people prefer using them.
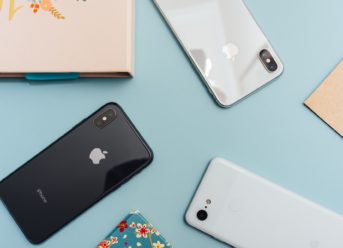
Camera quality

iPhones are usually renowned for their great camera quality, and let’s face it: taking photos and recording videos are among the main reasons why people buy smartphones nowadays! Apple is known for investing a lot in advanced camera technology, computational photography, and software enhancements. As a result, those iPhones will be capable of impressive photo and video capabilities.

You can convince people that you are a rich person

If you want to make others believe that you’re filthy rich, as you can’t seem to think about any other way of impressing your crush, you could consider buying an iPhone. You can even make some extra financial efforts, such as eating less for several months in a row in order to save the amount of money that you need. A new high-end iPhone is usually priced at around $1,000, which means that you definitely need to make some effort to make that kind of money. But as long as others will believe that you’re a rich person, if and only if you truly want that, what else could matter more?

Wide range of accessories

iPhones can also benefit from a wide range of compatible accessories, such as chargers, cases, smart devices such as Apple Watch smartwatches, and more. In other words, iPhones will open the door for you to a diverse and generous ecosystem.

Customer Support

We all have our moments when we need to reach customer support and demand answers, even if it’s about something that we can fix ourselves. iPhones usually offer some interesting customer support service, as those guys are always polite and willing to help out their customers. You can reach customer support through AppleCare, Apple Stores, and even online resources.

In the end, as long as you don’t reach customer support just because you forgot to charge your phone and you wonder why the device doesn’t start anymore, it shouldn’t be a problem.

There are numerous online stores that you can use to buy your next iPhone, such as eBay, Walmart, T-Mobile, the Apple Store itself, and many more.

Categories
Tech

“Notifications Silenced” on iOS 15 and iOS 16: What Does the Message Mean?

Learning how to handle an iPhone isn’t exactly like a walk in the park if you’ve been using only Android devices until that point. However, grabbing and using a smartphone created by Apple can be one of the most pleasing experiences as soon as you understand how it works. But things can surely become confusing if you open a person’s iMessage chat thread and the ‘Contact has notifications silenced’ text label appears.

Contrary to what you may be tempted to believe in such a situation, the person in question didn’t either block or mute you. The Focus status feature, which has recently been implemented by Apple, is to blame for the message. But let’s get into more depth, shall we?

What does “Notifications silenced” mean?

Focus modes are among the newly introduced features, and they comprise various profiles of customized notification settings that allow the user to disable notifications on the iPhone based on specific criteria. In other words, Focus profiles are to blame for the appearance of the ‘Contact has notifications silenced’ prompt.

Within the Focus modes, there is the Share Focus Status feature, which has the role of informing others that one of the Focus modes is activated on your iPhone. Therefore, the ‘has notifications silenced’ message shall appear in iMessage.

The message will appear to your contacts on the iMessage app with whom, you have had a conversation. But supposing you want to get rid of the message, you need to know that this can be done a lot easier than you might think!

How to remove the ‘has notifications silenced’ message

First of all, you need to know that it’s not possible to get rid of the message if you’re seeing it for a contact. Only if the contact turns off the Focus mode the message won’t appear anymore.

How to turn off the Share Focus Status

It’s time to learn how to turn off the Share Focus Status, so feel free to pay a little attention to the steps below! In case you use iOS 16, here are the steps:

  1. Open the Settings menu from your iPhone device.
  2. Head over to Focus, and then hit the Focus status option.
  3. Next to the Focus profile that interests you, you have to turn off the toggle. Or, you can disable the Share Focus status that appears at the top so that the Focus status for all profiles will be disabled.

If you’re using an iPhone that runs on iOS 15, on the other hand, here’s what you need to do to disable the Share Focus Status:

  1. Open the Settings menu.
  2. Select the Focus option.
  3. Select the focus mode where you need to turn off the Focus status.
  4. Select the Focus Status and deactivate the toggle that appears on the next screen.

That’s all, congrats! But there’s more information you need to know!

How to deactivate the Focus Status for iMessage

Disabling the Focus status for each Focus at a time could be a bit frustrating. Therefore, try to disable it for iMessage directly! To do so, all you need to do is open the Settings menu from your iPhone, select Messages, and deactivate the toggle that appears next to Focus.

How to deactivate the Focus Mode

Learning how to disable the Focus Mode will automatically turn off the Focus status and make you get rid of the ‘Has notifications silenced’ message.

For iOS 16 users, they need to open the Control Center, select the currently active Focus icon, and turn it off. If you’re using iOS 15, on the other hand, open the Settings menu, select Focus, select the needed Focus mode, and deactivate it from the next screen that will appear.

That’s pretty much all you need to know about the ‘notifications silenced’ message that has made a lot of iPhone users become frustrated!

Categories
Tech

iPhones Displaying SOS Texts: What Do They Mean and How to Remove Them

Let’s say that after reading tons of articles online about the old “Android vs. iPhone” subject, you’ve finally decided to buy yourself your first iPhone. Whether it’s the latest and the greatest iPhone 15, last year’s iPhone 14, or some older model, you might find yourself a bit frightened by the SOS text that appears in the top-right corner of the device. You’ve never dealt with such a situation before, which means that you clearly need some guidance.

We’re here to tell you what the SOS text displaying on an iPhone means and how you can get rid of it. Luckily, there’s more than one single way to remove the SOS text, so keep reading to find out!

What does “SOS Only” mean on an iPhone

If your iPhone displays the SOS icon or the SOS-only text, it means that your cellular network is going through some issues. Therefore, it’s impossible to make or receive usual phone calls, send messages, or even use cellular data. Instead, the iPhone can be used in case you need to make an emergency call (calling your girlfriend to find out where she’s been all night doesn’t count as an emergency in this case). Instead, it’s possible to call emergency numbers such as 911, 112, or similar ones.

Although iPhones usually display the SOS message because there’s no proper cellular network available, it could also mean that your SIM doesn’t have roaming privileges or the SIM card might not have been inserted in the correct way. If you haven’t paid your bills, on the other hand, you also shouldn’t be surprised if the SOS message appears, as it indicates that the SIM card doesn’t work anymore. The message could also indicate that the network has been changed to a different one in the settings menu.

How to remove the “SOS Only” message on your iPhone

Considering that there could be several causes for the emergence of the “SOS Only” message on your iPhone, it automatically means that there is more than just one possible fix. In other words, feel free to try out each of the methods at the time and see if the problem has gone away or not:

Re-insert the SIM card

Simply removing the SIM card from your iPhone, cleaning it, and then inserting it back into the device could solve your problem and get you rid of the “SOS Only” message. Before thinking that it sounds too good to be true, feel free to give it a try!

Check the network

If the network is poor, don’t be surprised if the SOS icon shows up on your iPhone’s display. Therefore, changing your location in the room or going to another area where you can get a good network signal might also save the day for you.

Restart your iPhone

Believe it or not, a lot of errors and problems can be solved by just restarting your device, and iPhones are no exception. A temporary bug might be what’s causing the SOS icon to show up on the display, which means that restarting the device can help a lot. You can do that by simply pressing and holding the power button until the Power slider shows up. From that point, you will have to drag the slider towards the right side. Wait a few seconds after your iPhone has turned off and press the Power button for the device to start again. Check if the pesky message has disappeared or not. If the issue still hasn’t gone away, it’s time to move on to the next possible fix!

Activate Data Roaming

In case you’re traveling to a different country than the original area where you received your SIM, it’s time to make sure that the data roaming on your phone is enabled. Here’s what you need to do:

  1. Head over to the Settings menu.
  2. Select Cellular data (Mobile data).
  3. Select Cellular data (Mobile data) options
  4. Activate the toggle that’s positioned next to Data Roaming.

Restart the cellular data

Consider restarting the cellular data or even turning it off completely to move on to a WiFi connection, if there is any. Pretty much anyone has a WiFi router at home nowadays or a good friend who has one and is willing to share the password.

But if you’re willing to keep clinging to the cellular data, you can just restart it and see if the problem with the SOS text message goes away or not. For that, head over to the Settings menu and then to Cellular Data. Be patient for a few seconds and turn it back on.

Reset the network settings

As one of the last resorts, resetting the network settings could also help you get rid of the SOS text appearing on your iPhone’s display. However, you need to keep in mind that this measure will erase all the network settings, such as WiFi and Bluetooth, and make them go back to their default statuses.

To reset the network settings, head over to the Settings menu, then go to General, hit the Transfer or reset iPhone, and ultimately hit Reset and Reset network settings.

Surely, it’s a bit difficult for anyone to figure out how to handle an iPhone after using only Android phones until that moment, but let’s not forget that it’s in the best interest of any tech company out there to make things as easy as possible for their customers. Apple is no exception, and it’s known for making a great combination of both the hardware and software parts for iPhones, making those two realms collaborate with one another in a very efficient way.

Categories
News Tech

How to unjailbreak an iPhone [iOS 11]

If you’ve finally decided to unjailbreak your iPhone, you can do that with the Backup and Restore feature of iTunes.  To unjailbreak your iPhone with this method, you’ll need:

  • Your iPhone (obviously)
  • A laptop (window or mac) with the iTunes app installed.
  • A USB cable

If you already have the above, then you’re all set to begin the unjailbreaking operation. Simply follow the tips below to unjailbreak your iPhone.

Unjailbreaking iPhone using iTunes Backup and Recovery feature

Unjailbreaking your iPhone using this process will usually restore your device to its original factory stock; as such you may want to back up your files before continuing with the operation.

How to back up your files

  • Connect the iPhone to your computer
  • Select your device from the options under the play controls
  • If this is the first time of connecting your iPhone to the iTunes app, a dialog box will come up on your screen asking you to confirm the connection. Click on the YES button to continue and then input your password.
  • Scroll to the backup section in the iTunes app on your laptop and click on the Backup now button.
  • Your files will be backed up within a few minutes. Note: iTunes will not backup your firmware, as such when you restore this backup after unjailbreaking, your device will not be jailbroken.

How to unjailbreak your iPhone

  • With your iPhone still connected to your computer, Press and hold the home and power button simultaneously for at least 10 seconds
  • Hold the home button for another 5 seconds until you see connect to iTunes, once this appears, you can let go of the home button.
  • The next step is to launch the iTunes app on your laptop
  • A dialog box will come up asking if you want to the app to make changes your device, click the YES button to continue
  • Once the app finishes loading, you should see a Check for Update button and also a Restore iPhone Button.
  • Click on the Restore iPhone button
  • Your iPhone will begin the restoration process and will take several minutes to complete. Note: your IOS will also be upgraded to the latest version during the restoration.
  • This unjailbreaking process restores the phone to its default settings as such all your data and settings will be wiped clean.
  • Once your phone has been fully restored, you can follow the prompt up screen to setup your device again

How to restore your backed up files

After completing the set up, you can restore your backed up files from the iTunes app on your laptop, by connecting your iPhone to it, and launching the iTunes app.

  • Go to the backup section again and click on the restore from backup button.

This will restore your previously backed up files.

Categories
News Tech

How to fix app crashes on jailbroken iOS 11

Jailbroken and currently facing those annoyingly constant app crashes on your iPhone? Well now you can fix those frequent crashes on your jailbroken iPhone following these simple tips.

Causes of app crash and how to fix them

  • App not compatible with your current OS

Your first troubleshooting step should involving checking the compatibility of the app with your device OS. While this may seem like an obvious cause and an easy fix, most users often neglect this important step.

Open your Appstore and Check if the app is compatible with your OS or the repository and check the requirements, If it’s not compatible, kindly uninstall it and check for an alternative.

  • Opposing apps installed

Not all apps play nice with one another especially those that makes use of the low-level permission (jailbreak). Some of these apps may not work well if the other is installed. As such you may want to check the timeline of the installation of various apps and see when the crashes began. Uninstall your apps chronologically starting with the newest and you’ll end up catching the culprit.

If you observe such incompatibility, you might want to send the developer an email to help them make changes to the app so that you can use them later.

  • Bad apps from an untrusted repository

One of the responsibilities that come with jailbreaking is taking care of your phone security. There are many repositories out there that you can get powerful apps from once you jailbreak your iPhone. Unfortunately, not all of them can be trusted. Some are quite dangerous. As such if you have installed an app from any repository you’re not sure of their integrity, you should definitely uninstall such app as they may be the cause of the crash.

  • Restoring from a jailbroken backup

After unjailbreaking your device, you probably have restored your files back again from a backup created from a previously jailbroken iPhone. If you find your springboard constantly crashing, this might be the culprit. To fix this, you might want to completely restore your phone and start afresh. This may seem a huge price to pay but for peace of mind, it might be your best option.

Quick troubleshooting tricks to find the apps causing crashes on your jailbroken iPhone

  • Install iCleaner app
  • Launch and click on the + sign
  • Add all the Cydia substrate add-ons
  • Toggle the switch button for the first 50% apps (if 10, turn off the first 5)
  • Close the iCleaner, respring and see if the crash still occurs. If yes then the bottom apps may be the cause of your problem.
  • Toggle half of the remaining apps, respring again and see if the crash still occurs.

Continue this process until you’re left with the app that causes the problem and then uninstall it. This should fix the crashing problem.

Exit mobile version