Categories
News Tech

How to Transfer Files from iPad to iPhone (or Vice Versa)

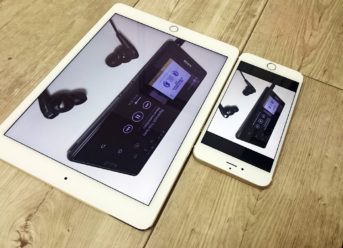
Do you intend to transfer your photos from your iPad to iPhone? This post will show you different ways to transfer your files from iPad to iPhone. Hence, you can easily transfer your photos, audio or video files, contacts, messages, etc. across your iOS devices.

How to Transfer Files from iPad to iPhone

Method 1: Use your PC

The easiest way of transferring files across iOS devices is to use your computer. All you have to do is connect your iPad and iPhone to your computer using USB cable. Then navigate to This PC to locate your iOS devices. Copy and paste the digital files across your iOS devices as you wish.

But if you want a software-based solution, you can try other methods listed below.

Method 2: Use iCloud

Here’s how to do this:

  • Backup the files you intend to transfer on iCloud. Go to Settings > iCloud
  • On the iOS device you intend to transfer files to, sign in to iCloud using your Apple ID and then select the backup to commence the transfer operation.
  • Wait for the process to be completed.

Note: Ensure you have a strong internet connection in place before commencing this procedure.

Method 3: Use iTunes

Follow these steps to use iTunes:

  • Launch iTunes, go to the Account menu to sign in with your Apple ID.
  • Connect your iPad (or the device you intend to transfer files from) to your computer and then click on Tick This Computer > Back Up Now.
  • Again, connect your iPhone (or the iOS device receiving the files) to your computer. Click on the phone icon at the iTunes window and then tap on Restore Backup.
  • Select the backup file you intend to restore on the new iOS device to commence restore operation.

Alternatively, you can make use of Airdrop to transfer files across your iOS devices with issues.

Method 4: Use dedicated software solutions

You can make use of other third-party software which are applicable in transferring files across iOS devices i.e. from iPad to iPhone (or vice versa).

Some of the noteworthy software you can use includes:

While some of the software solutions we listed are free, others are available at a premium price. But they are excellent in transferring your files across iOS devices.

Hope you find this helpful? Drop us a comment to share your experience with us.

Categories
Tech

How to fix iTunes Error 3194 successfully

Did you get the error 3194 while trying to restore your iPhone/iPad? This post will show you how to fix the iTunes error 3194.

iTunes error 3194 is an error associated with failed upgrade of iOS device to another version. This error may be caused as a result of jailbreak, blocked connection, unsigned or expired firmware, etc. Nevertheless, we will show you simple ways to fix the error.

How to fix iTunes Error 3194

Method 1: Check Hosts Files

  • Close iTunes application on your Windows/Mac computer.
  • Open the hosts file with administrative rights:

For Windows OS: C:\windows\system32\drivers\etc\hosts

For MacOS: Go to this path: /ect/hosts

  • Locate 74.208.105.171 gs.apple.com entry.
  • If you are able to locate 74.208.105.171 gs.apple.com entry, add a “#” to the front.
  • If you are unable to locate the entry, add 74.208.105.171 gs.apple.com at the bottom of the hosts file.
  • Save the hosts file afterwards, and then try update your iOS device on iTunes.

In you are still getting the iTunes error 3194, you can proceed to the next solution.

Method 2: Use TinyUmbrella

TinyUmbrella is an excellent utility tool which can be used to upgrade/downgrade your iOS device. Also, it is applicable in fixing the iTunes error 3194.

  • Download the iOS firmware for the upgrade/downgrade of your iOS device.
  • Download TinyUmbrella
  • Connect your iPhone to your PC and close iTunes.
  • Now, launch TinyUmbrella and click on ‘Start TSS Server’.
  • Connect your iOS device to your computer and then open iTunes.
  • Switch off your iOS device by holding the sleep/power button.
  • Start DFU mode: Press the home, and power button for 10 seconds and then release only the power button. Wait until iTunes shows you the “your device is now in recovery mode” message.
  • Now, update your firmware:

For Windows: Click on Shift + Restore

For Mac: Option + Restore

  • Locate the iOS ipsw file previously downloaded in the first step.

Method 3: Reset your iOS Device

Another way to fix the iTunes error is by resetting your iOS device through iCloud.

Here’s how to do this:

  • On your web browser, go to the iCloud official website
  • Navigate to the Find My iPhone service in iCloud.
  • Select the iOS device you want to restore.
  • Click on the “Erase” button in your iOS device’s card.
  • Now, wait for the iOS device to automatically reset.

Note: Ensure you backup your iPhone/iPad data before you proceed with the reset process.

Hope you find this helpful?

Categories
Tech

iPhone Overheating Problem? Solutions and Tips to eliminate the problem

Basically, the Apple brand is parallel to premium quality with over 1.3 billion users worldwide. However, there are several reports emanating from iPhone users around the world about the iPhone overheating problem.

When intensive activities such as 3-D gaming, video streaming, etc. are performed on iPhone, it stresses the battery, GPU, and CPU which can result in overheating in the long run. Nevertheless, the impact of overheating varies in its severity across all iPhone models. Some iPhone users reported getting the overheating warning message while in some cases iPhone explosion.

Cool tips to cool down your overheated iPhone

When you observe that your iPhone is steadily overheating, be sure to try out any of the tips below:

  • Keep your iPhone away from sunlight.
  • Turn on the Airplane mode.
  • If you are already charging your iPhone, stop charging and wait for it to cool down.
  • Stop using Wi-Fi/Hotspot/ Bluetooth.
  • Ensure you are using original Apple cable to charge your iPhone.
  • Switch off your iPhone for 4 hours.

If these tips do not reduce the temperature of your iPhone, you can try any of the workarounds we listed below.

How to resolve iPhone Overheating Problem

Method 1: Limit intensive activities on your iPhone

Several intensive activities which might cause the iPhone overheating problem include video streaming, GPS navigation, gaming, chatting, and more. Therefore, it is highly recommended that you limit the time spent on these activities which might damage your device battery and CPU in the long run.

Method 2: Toggle off Background Refresh

Background Refresh is a background process which refreshes all installed apps in the background. On the other hand, Background Refresh can get your iPhone overheated when utilized automatically. Therefore, it is highly recommended that you utilize Background Refresh for selective apps.

Here’s how to do that:

  • Go to “Settings” > “General” > “Background App Refresh

Method 3: Reset All Settings

Resetting all settings on your iPhone can potentially fix the overheating problem. This process removes all personal settings for General, Sounds, Wallpaper, Wi-Fi, Bluetooth, Privacy, Notifications, and Brightness.

Follow these steps to reset all settings:

  • Go to “Settings” > “General” > “Reset” > “Reset All Settings”. Now, enter your Apple passcode and wait for the iPhone to reboot.

Note: This solution does not delete your iPhone data such as videos, music, photos, emails, etc.

Method 4: Update iOS

Some iOS users recounted that they were able to resolve the iPhone overheating problem by updating their iOS device to the latest version.

Follow these steps to update your iOS device:

  • Go to “Settings” > “General” > “Software Updates” > “Download and install the update available”.
  • Wait for the update to be completed.

Do you find this post helpful? Drop a comment below.

Categories
Tech

[Fix] iOS Apps crashing frequently

Does your favourite iOS app crash frequently on your iPhone or iPad device? We will show you how to resolve this issue.

Several iOS users reported that their favourite apps such as Skype, Safari, Kindle, Facebook, Viber, or any other app crashes unexpectedly after launch or freezes their devices.

In order to resolve this issue, we will share with you the best troubleshooting methods to fix iOS apps crashing.

How to resolve iOS Apps crashing frequently

Method 1: Reboot the Device

The easiest way to resolve the iOS app crashing problem is to reboot the device whenever the problem occur. You can easily force-reboot your iOS device by holding down the Power and Home button until the Apple logo displays. Afterwards, you should be able to relaunch the problematic app without issues.

Method 2: Update the App

Outdated iOS apps can result in the crashing problem thereby causing your device to freeze. Moreover, app developers frequently identify bugs on their apps and then release an update to the app to resolve the glitches. Therefore, you should update the problematic app on your App Store.

Here’s how to do this:

  • Launch the App Store and navigate to the “Updates” menu
  • Install the updates for the problematic app
  • Afterwards, launch the updated app

Method 3: Re-Install the problematic app

Reinstalling the problematic app can resolve the iOS app crashing problem. This process requires uninstalling/deleting the particular app and then re-install the app afterwards.

Follow these steps to re-install the problematic app:

  • On the iOS Home Screen, tap and hold on the app icon
  • Now, Tap the (X) icon when it appears, and then confirm to delete the app
  • After deleting the app, launch the App Store, and then search for the particular app to re-download

Method 4: Update your iOS device

Frequent iOS updates by Apple Inc. ensure that your devices are stable and devoid of bugs. Moreover, some if the latest patches can fix any app-related issues most especially the iOS apps crashing problem. Hence, it is highly recommended that you update your iOS device to the latest version.

Here is how to update your iOS device:

  • Back up your iPhone (or iPad) data to either iTunes or iCloud or iTunes
  • Launch “Settings” > “General” > and then go to “Software Update
  • Select “Download & Install” and then wait for the iOS updating process to be complete

After the iOS update process, you can then advance to relaunch the app in question.

Note: Please ensure that you backup your iPhone data before you proceed.

Hope you were able to resolve the iOS apps crashing problem on your device? Feel free to share your experience with us by commenting below.

Categories
Tech

4 Ways to Fix iPhone Black Screen of Death

iPhone is without doubt one of the prestigious smartphones in this modern age. However, iPhone users encounter several issues such as the iPhone Black Screen of Death. The iPhone Black Screen of Death on the other hand, is simply an instance where the iPhone screen is completely black.

The black screen in iPhone may occur as a result of hardware or software issues. For instance, iOS upgrade/downgrade, iOS jailbreaking, firmware modifications, drained battery, crashed app, etc. But we can show you effective solutions to fix this problem.

Fix iPhone Black Screen of Death using any of these solutions

Solution 1: Force-restart your iPhone

If you experienced the iPhone black screen problem, you should immediately restart your iPhone.

Here’s how to do this:

For iPhone 7 or iPhone 7 Plus: Press and hold both the power and volume button for at least 5 seconds until the Apple logo appears.

For other iOS devices: Press and hold both the Power and Home button, for at least 10 seconds until the Apple logo appears.

This will resolve the black screen problem after the reboot.

Solution 2: Charge your iPhone

One of the main reasons why the iPhone black screen problem may occur may be due to drained brained. Therefore, you should connect your iPhone to a power adapter. Press the Home button and the wait for a few minutes till the Apple logo appears.

Solution 3: Close the problematic app

If your iPhone screen went black after launching a certain app, then that app is responsible for the problem. In order to fix the problem, quickly press the “Home” button twice, and then swipe the screen to see a list of recent apps. Once again, swipe off that specific app to close it and press the Home button to return to the home screen.

Solution 4: Contact Apple Store

If you are still unable to fix the iPhone Black Screen after trying out any of the afore-mentioned solutions, then the black screen may be due to a hardware issue. For instance, the iPhone may have fallen to the ground. Nevertheless, you should take your iPhone to the Apple Store if under warranty coverage.

Hope you were able to fix the Apple iPhone Black Screen problem by applying any of the solutions we mentioned above? Drop us a comment below.

Exit mobile version