Categories
Markets News Tech

How to Fix An iPhone That Won’t Charge

Do you experience the iPhone not charging problem? Well, you are not alone. Let’s show you how to resolve this problem.

iPhone is not devoid of issues despite its luxury status; however, the iPhone not charging problem is one of such issues.

Fix: iPhone not charging problem

Solution 1: Hard Reset Your iPhone

You should always try this first before any other thing. By performing a hard reset, you can check whether the fault is located in the hardware or software. Press the home and power buttons to reset your iPhone for few seconds. Wait for it to reboot and then charge your device once more.

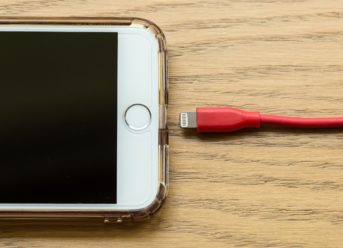
Solution 2: Check For Any Damage On Your Lightening Cable

Take your iPhone cable, observe both ends of the cable. Check to see for any damage,scratch or break. If after having a close look and you don’t find any damage. You should then try these few steps:

  1. Connect your iPhone to a PC and see if it charges. If it still doesn’t, then the fault is from the cable and not your phone.
  2. Try connecting your iPhone to your car, see if it charges. Note that your charger is faulty if it doesn’t.
  3. Try charging your iPhone in different locations, it is advisable to use a friend’s cable.

After you must have tried all these steps, you should be able to know where the fault emanates from.

Solution 3: Clean the charging port with a toothbrush

This might sound crazy but it is possible for your iPhone to stop charging due to dirt in the charging port. Grab a clean brush, gently clean it, take all your time and don’t rush the process, check to see for any more dirt and repeat the process.

Solution 4: DFU Mode

There’s still one step to carry out if you find out that your iPhone has stopped charging. Before trying this, be sure to back up your data. This process involves factory resetting your phone using iTunes.

Solution 5: Visit a nearest Apple store

If after trying everything and the problem still persist, then you should call the geeks. Visit the nearest Apple store or an Apple Authorized Service Provider.

Hope you find this helpful?

Categories
Markets News Tech

How to speed up your iOS device

Is your iPhone is no longer as fast as it used to be? Let’s show you how to speed it up.

With more loads, apps, and media on your device, it’s bound to slow down to a frustratingly snail crawl.

Fortunately for you, you don’t have to splash your money on a new IOS device because you can easily speed up your IOS device by making little changes.

Speed up your iOS device with these effective tips

Follow our tips below on how to speed up your IOS device and in a few minutes, you’ll be surprised at the performance of your device.

Turn Off iCloud Backup and Sync

As a standard, all IOS users will need to login to their iCloud account on an IOS device. iCloud helps with automatic backup and sync of media, files, and passwords.

While this process is quite essential, it is also a huge resource consumer and can easily slow down your IOS device. You don’t have to back up all your files all the time. You can easily turn the feature off and then on again when you need to backup important changes. To do this:

  • Go to App Settings > tap on iCloud > Log in to iCloud > Disable Sync
  • Turn this option off for photos, calendar, contact, and iCloud backup

Uninstall Seldom Used Apps

The truth is, most of us install apps we need for just a once in a while kind of operation and then leave them lying around. If you have an app that you hardly use, you probably should uninstall it as the more apps you have on your drawer, the slower your IOS device will become. To uninstall an app:

  • Press and hold the app until an X symbol appears
  • Tap the X symbol, and the app will be uninstalled.

Clear Safari Cache

Safari stores a lot of your browsing data. These data are mainly stored on your device so safari can give you more personalized browsing experience. The price you have to pay for this is the slow loading speed.

To speed up your phone and consequently safari, you’ll need to get rid of these data from time to time. To clear stored data;

  • Navigate to Settings > Safari > Clear History and Website Data

Turn Siri Off

If you don’t use Apple’s smart voice assistant regularly, you should turn her off. Siri consumes more CPU space and power than you can imagine. To turn Siri off:

  • Navigate to Settings > General > Siri, and toggle off Siri.
  • When asked to confirm if you want to turn Siri off, click on the turn off button.

Sluggish devices are quite frustrating, follow the above tips and see how much your IOS device would pick up speed again.

Hope you find this helpful?

Categories
Markets News Tech

How to Fix an iPhone Stuck In Recovery Mode

Is your iPhone stuck in recovery mode? Don’t panic, we’ll show you how to resolve this issue. You can get your iPhone out of recovery mode without losing any data.

Recovery mode is a situation where your device is not detected by iTunes. It is used to resolve numerous issues such as software error or abnormal functioning of some apps, but your device can also get stuck in the process.

Let’s look at the reasons why your iPhone is stuck in recovery mode.

Reasons Why Your iPhone Is Stuck In Recovery Mode

The common reasons why your iPhone is stuck in recovery mode is due to the following activities:

  • Incorrect Jailbreaking – Users remove restrictions so as to install awesome apps.
  • Updating IOS – When there’s no sufficient battery to carry out the process. Your device gets stuck.

Other causes include: restoring of factory settings, water damage, downgrading iOS, battery replacement etc. In cases like this, getting your iPhone out of recovery mode is your priority.

How To Fix iPhone Stuck In Recovery Mode

You should try the procedures enlisted below:

Solution 1: Manual Rebooting

You can easily get out of recovery mode with this process. The two important thing needed is your device’s home and power button. If the two buttons work fine, follow these steps to get your phone out of recovery mode:

  • Press and hold the Home and Power buttons simultaneously for about 15seconds.
  • The phone will turn off, press the power button to restart the iPhone. Then the device will get back to its normal state.

Solution 2: Use iOS System Recovery

You can use iOS System Recovery to salvage the situation. You can simply fix the issue without losing any data. It also has benefits attached to it as you can recover lost data such as messages, missed calls, contacts etc. In no time, let’s look at the steps to carry out this activity:

  • Download and Install iOS System Recovery on your PC
  • Launch the program and connect your iPhone through USB. After detecting your phone, it will display that it is in recovery mode.
  • Download Device Filmfare – Tap on “More tools” > “IOS System Recovery” > “Start Button” You will then need to download Filmfare version. After the download, the program will start to fix your device and it will get back to its normal mode.

Hope you find this helpful?

Categories
Markets News Tech

How to install Extensions on UC Browser

UC browser is built on chromium, the framework on which Google Chrome is built on. Nevertheless, UC Browser users can also install their favorite chrome extension on UC browser.

This post will guide you through on how to install chrome extensions on UC browser, manage these extensions and how to uninstall/delete them when you get tired of them.

How to install chrome extensions on UC browser

Here’s how to do this:

  • Launch your UC browser from the desktop.
  • Visit the Chrome store.
  • Search for the extensions or theme you want.
  • Alternatively, you can search for the extension with a search engine like Google with a search query like ‘VPN extension for Google chrome’.
  • Each search result in the chrome store will come up with a blue button ‘Add to Chrome’ button.
  • Click on the button and a dialog box will come up, asking you to confirm that if you want the extension to be added to your browser.
  • Click on the add extension button and it’ll automatically start downloading. UC browser will download the extension and then automatically add them to your status bar.

When added for the first time, most add-ons will open a new tab to give you an idea of what the extension does and how to use them. Some will require that you sign up before continuing.

How to uninstall or delete an extension

If you’re no longer in need of an extension or if it does not perform the way you thought it should have, you may want to disable or delete such an extension from your UC browser. To delete an extension from your browser is quite easy:

  • Launch your UC browser
  • Locate the ‘Manage my Extensions’ button and click on it. This will give a dialog box showing all installed extension on the browser
  • Beside each extension, you’ll find a box checked, showing that the extension is enabled.
  • If you want to disable the extension simply uncheck the box and the extension will be disabled.
  • To delete an extension, click on the waste bin icon and the extension will be deleted from your UC browser.

When it comes to themes and extensions UC browser offers you as much as Google Chrome. As such you can use just about any theme or Google Chrome extensions on UC browser as you want. Simply follow the above tips on how to add chrome extension to UC browser and you’ll have your extension up and running within a few seconds.

Hope you find these tips helpful?

Categories
Markets News Tech

How to fix Opera Mini Crashes on Android Phone

Opera Mini is one of the fastest mobile web browsers in existence. Opera Mini has different version for your android phones, tablets, laptops and more. However, in recent times, some users reported that they experience frequent Opera Mini crashes on their Android devices.

What Causes Opera Mini Crashes on Android Phones

The factors below are some of the reasons why Opera Mini might have crashed or unexpectedly stopped working on your Android phone.

  • Multi-Tasking: Sometimes, users may be browsing different sites at the same time and this might cause the browser to stop working. Moreover, Opera Mini is not geared towards heavy-duty browsing activities.
  • Low Storage: The Opera Mini cache on your Android smartphone might be filled with temporary or irrelevant files. If this happens, there’s a high possibility that it could cause the browser to crash.
  • Outdated Version: Outdated Opera Mini versions are prone to frequent crashes and virus attacks. Subsequently, whenever you update your Android phone to a higher OS, your application becomes outdated for the latest OS version.

However, there are ways to fix this problem and make browsing easier.

How to fix Opera Mini Crashes on Android Phones

Method 1: Update Opera Mini

Updating Opera Mini is the primary solution to the crashing problem.

Here’s how to update Opera Mini:

  • Go to Google Play Store
  • In the list of install apps, search for Opera Mini, and then click on it.
  • Tap on Update
  • Wait for the update process to be completed and then launch Opera Mini.

Method 2: Clear your Opera Mini cache

Excess Opera Mini cache can also cause Opera Mini to crash on your Android phone. Hence, you should clear the cache.

Here’s how to do this:

  • Go to Settings.
  • Click on Applications.
  • Locate and tap on Opera Mini.
  • Click on Storage and then click on Clear Cache.
  • Afterwards, launch Opera Mini.

Alternatively, you can make use of Cache Cleaner applications for this purpose.

Method 3: Reinstall Opera Mini

Ultimately, reinstalling Opera Mini can resolve the crashing problem as well. You can simply do this by uninstalling Opera Mini and then install the app afterwards.

Here’s how to do this:

  • Go to Settings.
  • Click on Applications.
  • Locate and tap on Opera Mini.
  • Click on Uninstall.
  • After the uninstall process, go to Google Play Store, search for Opera Mini and then install it immediately.

In conclusion, any of the aforementioned solutions should fix the Opera Mini crashes on Android Phones.

Share your Opera Mini experience with us by dropping a comment below.

Exit mobile version